
SnapBallot Overview
Last updated September 29, 2026
This overview walks you through setting up an election in SnapBallot from start to finish — creating a ballot, uploading voters, adding ballot items and candidates, configuring emails, and confirming your schedule.
View Transcript
[0:00]: Welcome to Ballot Bytes. Today's topic covers how to build a ballot in a snap.
[0:05]: The dashboard will display a list of your elections. To create a new election, click "Create New Ballot" and type in the name of your election. Choose your time zone and set the open and close dates. You'll upload your logo. Next, you'll add your home page URL or the page to redirect voters when they exit the election website. There's also an option to select a complimentary voter satisfaction survey. You'll also see an option to view preliminary results. This setting cannot be changed once voting begins, and there are some helpful tips shown here to guide you. Then click save.
[0:48]: Now you're all set to add your voters. You can do this either by upload or one by one. Simply click "Upload Voters" and find the file of your database. You'll confirm which fields and columns you'd like to include. If your data contains columns you don't need, you can choose to ignore that column, and it will exclude that data. If everything looks good, continue to column configuration.
[1:22]: If your data includes member ID, this must be unique for each individual voter. Ensure your columns are mapped correctly. We've got member ID, first name, and last name. Region in this data set may be used as a filter later. So, we're going to go ahead and map this to group or type. If everything looks good, save column mappings and create voters.
[1:48]: The upload summary will show an overview of your data. If there are any issues with your email addresses, a warning will pop up. To correct errors, simply click the voters page and show issues. Select the voter with an issue and edit and update. You can also update any of the data fields by clicking edit by voter details. Make any edits and save.
[2:17]: If you realize a member may have been missed, you can easily create voters one at a time. Create new voter, add their information, and then create.
[2:28]: Now that all the voters are set, let's move on to the ballot. The first thing you want to do is add a ballot item. Fill in the title, and set your minimum and maximum votes. If there's rotation on the ballot, you can select that here and this will rotate items on your ballot. If you have any additional information or instructions, you can add that here and then save.
[2:54]: Now you're ready to add your candidates. For this one, we'll also add a write-in. Once candidates are entered, you can add their biographies and their photos. Just click the candidate, create biography, choose a file and add your content, and be sure to save. You can edit anytime before the election opens. Select the candidate and choose their biography. You can make any changes here and always be sure to save.
[3:32]: If you have other ballot items or offices, select ballot item and add the name. Let's say this one's a bylaw vote. You'll add the text or any instructions here in the additional information box and save. Snap Ballot will warn you to be sure to add the choices for the voter. You can preview the ballot to see how it will appear to the voter.
[4:11]: The next step is to set your emails. All Snap Ballot plans include one invitation email sent to voters at election open, one confirmation email sent to voters after they submit their ballot, as well as up to two reminders. Each email can be customized with your details to personalize your message and we'll handle the rest: the secure links, login details, and delivery.
[4:39]: You'll have sender name and the reply-to email. You can select an admin's email or the "no reply." You can customize your subject and your message here. The standard message section is automatic and cannot be customized. This email includes a secure ballot link unique to each voter. After the voter submits their ballot, the ballot link is deactivated to prevent double voting. A helpful video walks through the process.
[5:09]: Reminder emails are sent after voting opens and only go to voters who have not yet voted. You can set up those email reminders here. They're a great way to encourage participation and you can create multiple emails with custom messages. If more than two are used, they will be charged depending on your plan. And there's a nice reminder here that shows that for you.
[5:33]: Finally, payment and scheduling. This is based on the number of voters. You can see here I need to make a payment because I'm over the 15-voter limit for the free plan. It will default based on your number of voters, but you can select the plan that you prefer. Proceed to service level selection and payment. If you wanted to add additional reminder emails, you can do that at any time.
[6:02]: Then click "Proceed to Payment." Fill in your credit card details. As soon as payment is complete, you'll get a confirmation that it was successful. Now you can go back to configuring your ballot or sending invitations.
[6:19]: If you're all set and ready to go, all you need to do is confirm. Simply click "Confirm Schedule." You will now see the ballot status, completed items, time zone, and open and close dates. Your election is now ready to go. Thanks for watching.
Create a new ballot
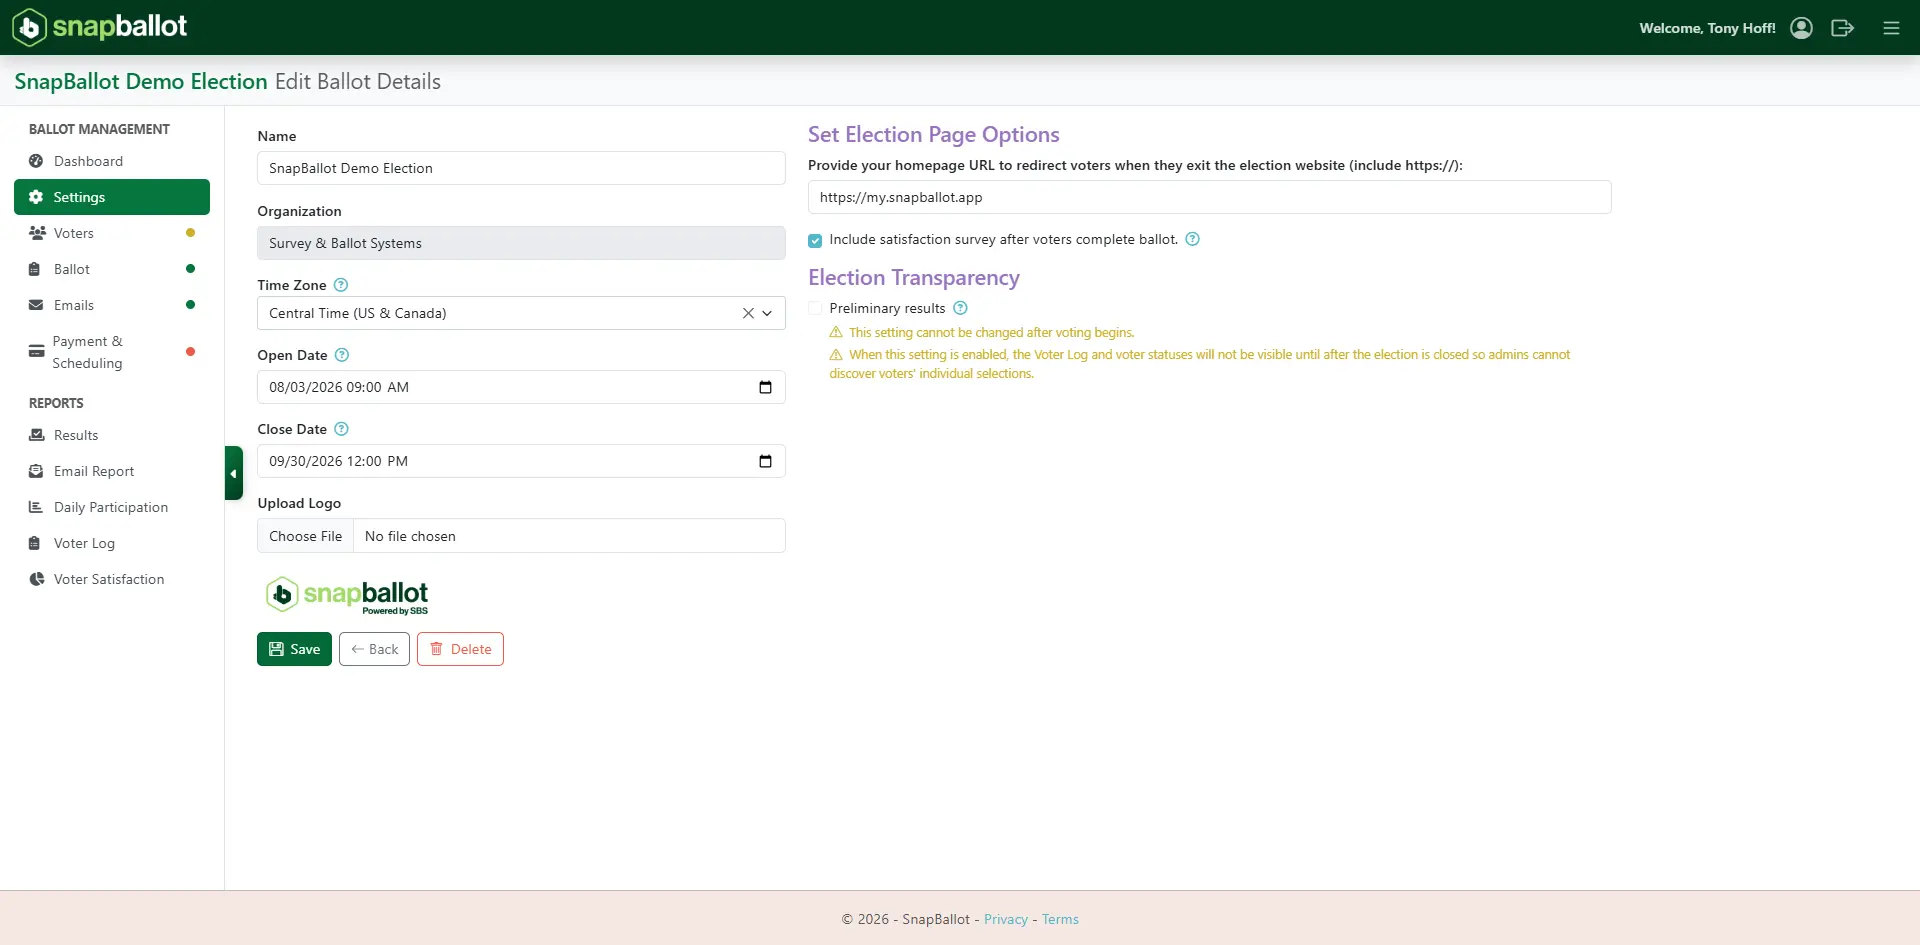
- From the dashboard, click Create New Ballot.
- Enter the election name.
- Choose the time zone.
- Set the open and close dates for voting.
- Upload your logo.
- Add your homepage URL or the page voters should be redirected to when they exit the election site.
- Optionally enable:
- a voter satisfaction survey
- preliminary results viewing
- Note: the preliminary results setting cannot be changed after voting begins.
- Helpful tips are shown on screen, then click Save.
Upload voters

To upload voters:
- Click Upload Voters and select your database file.
- Choose which fields and columns to include.
- If a column is not needed, mark it to be ignored so that data is excluded.
- Continue to column configuration.
- Member ID is not required. However, if your data includes a member ID, make sure it is unique for each voter (no duplicate member IDs).
- Map each column correctly, such as:
- member ID
- first name
- last name
- region (an example: can be used later as a filter)
- vote weight
- Save the column mappings and click Create Voters.
- Review the upload summary for any warnings, especially email issues.
- If there are email issues, go to the Voters page, show issues, and edit/update the affected voter.
Edit voter information (if needed)
If there are issues with your upload, a warning will appear.
- Go to the voter's page.
- Select the voter with an issue.
- Edit the necessary information.
Create individual voters (if necessary)
If you need to add a voter manually, click Create New Voter. The fields shown are based on the columns in your upload list.
- Click Create New Voter.
- Enter the voter’s information.
- Click Create.
Add ballot items

- Click to add a ballot item.
- Fill in the title and set minimum and maximum votes.
- If desired, enable Rotation to display ballot options in a randomized order on each voter's ballot.
- Add any instructions or additional information.
- Click Save.
Add candidates and their information

- Enter the candidates' names and save.
- Optionally, add biographies and photos for each candidate.
- Select the candidate, create or edit the biography, upload the file, and save.
- You can continue editing candidates any time before the election opens.
Add additional ballot items
- Click Ballot Item to add another item, such as a bylaw amendment.
- Enter the title, set maximum and minimum votes, add copy, text or instructions in the additional information box then click Save.
- At anytime, click Preview Ballot to see what voters will be presented.
Set up invitation emails
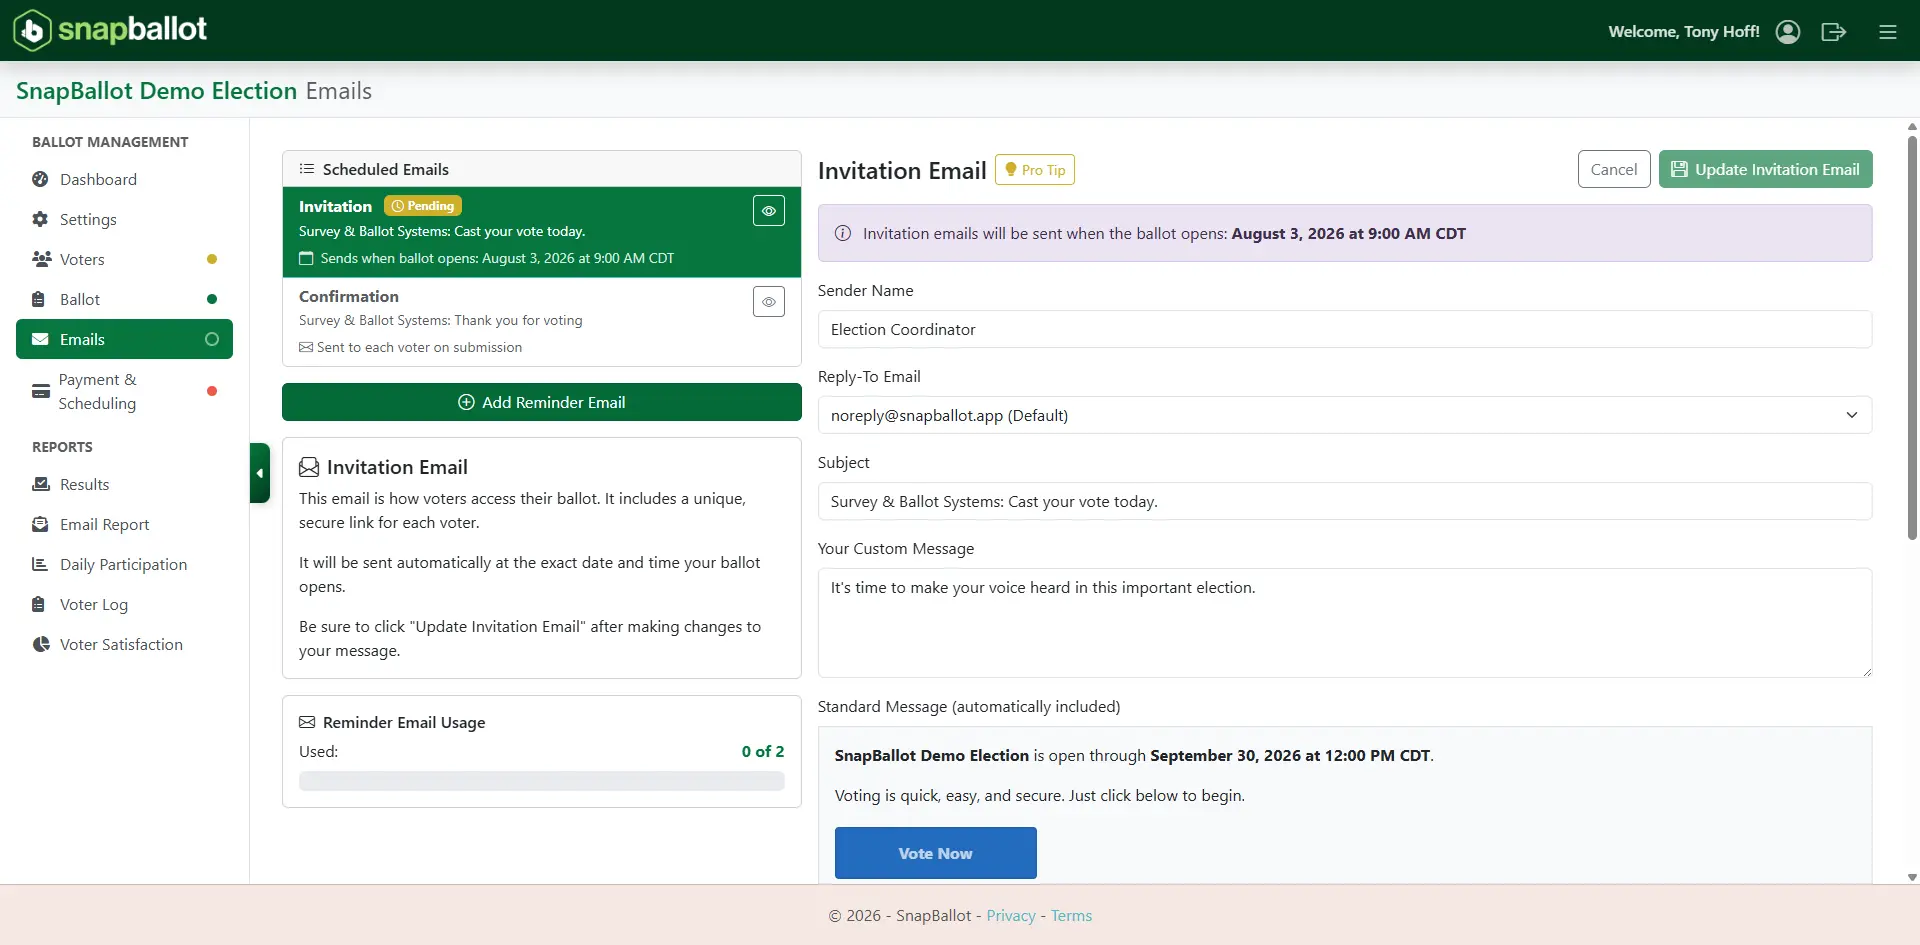
- Customize the invitation email sender name and email address.
- Change the subject line or add a custom message if desired.
- Every SnapBallot plan includes:
- 1 invitation email and 2 reminders to non-voters
- All voters receive a confirmation email after voting
Note: Invitation emails are scheduled to send on the date and time the election opens.
Set up email reminders

Each plan includes an invitation email and two additional reminders.
- Edit within the Custom Message box.
- Add a Schedule Send Date/Time.
- Click the Add Reminder Email button directly below the Schedule Send Date/Time.
- Repeat the same process to add another reminder email.
To edit your reminders, make a selection from the Scheduled Reminders list on the right-hand side of the page.
Customize the confirmation email
- Customize the confirmation email text that voters receive after voting.
- Click Save.
Payment and scheduling
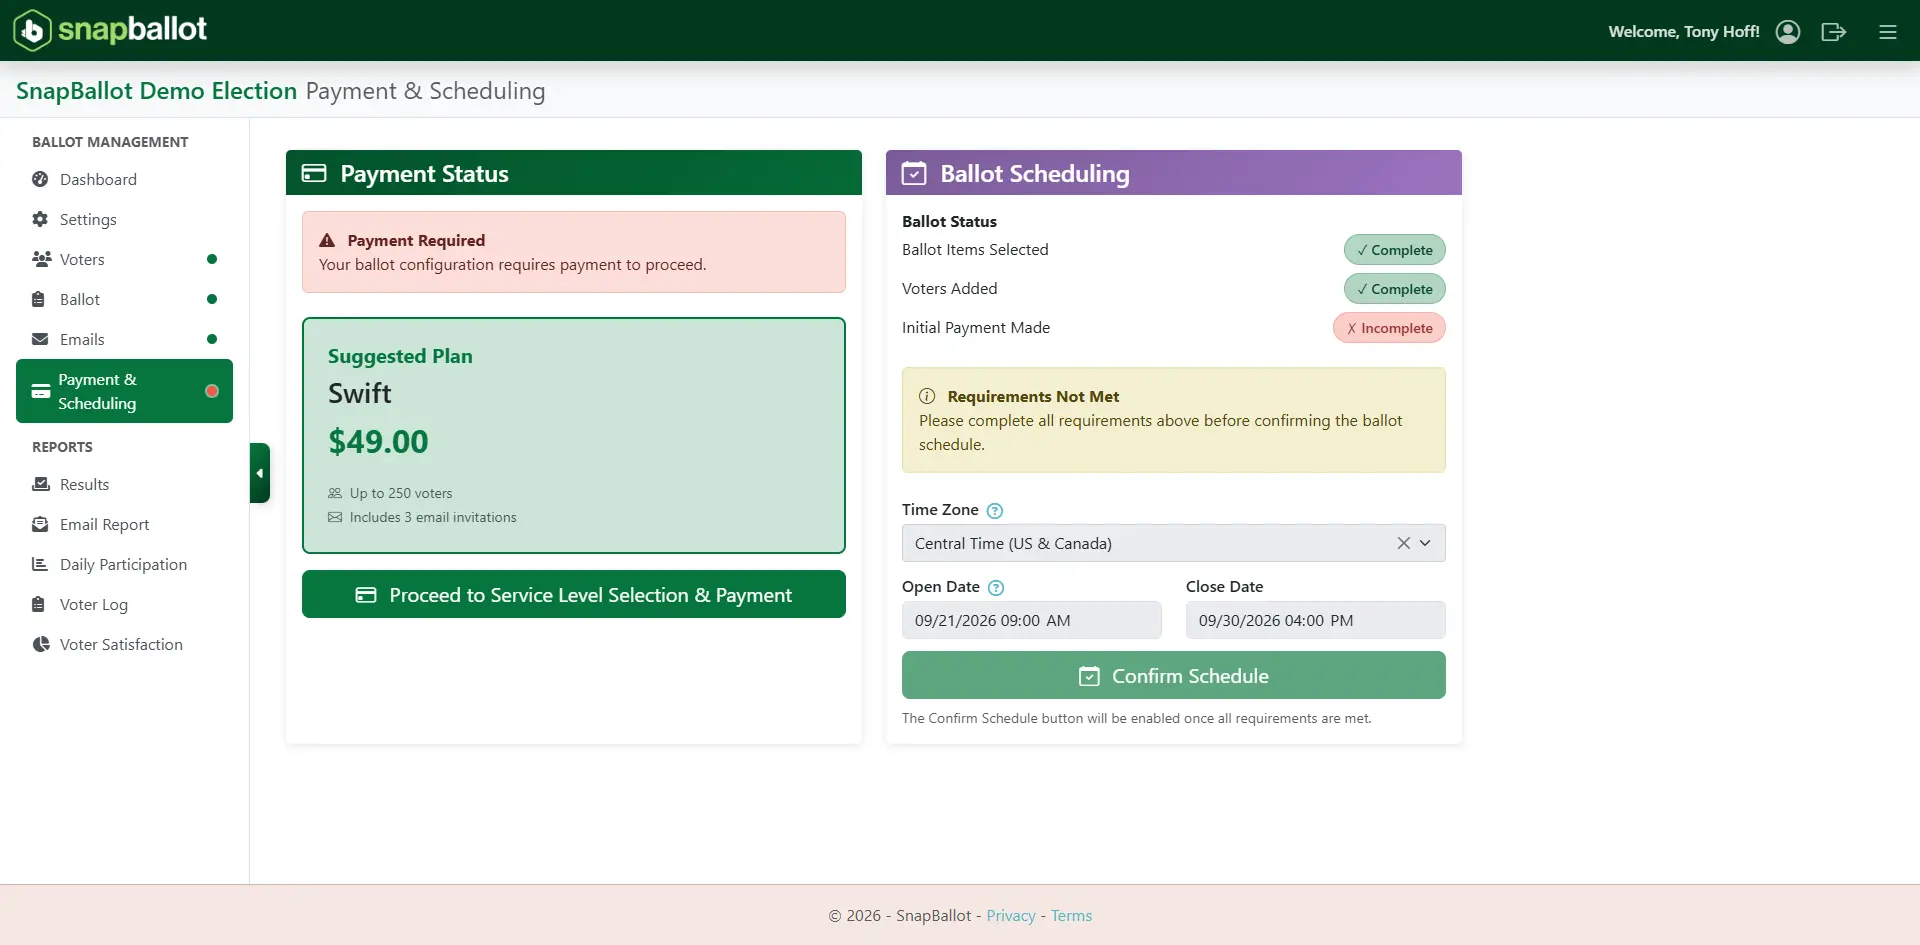
- Review payment options based on the number of voters.
- Select your preferred plan and proceed to payment.
- Once payment is successful you'll see a confirmation message.
Confirm your schedule
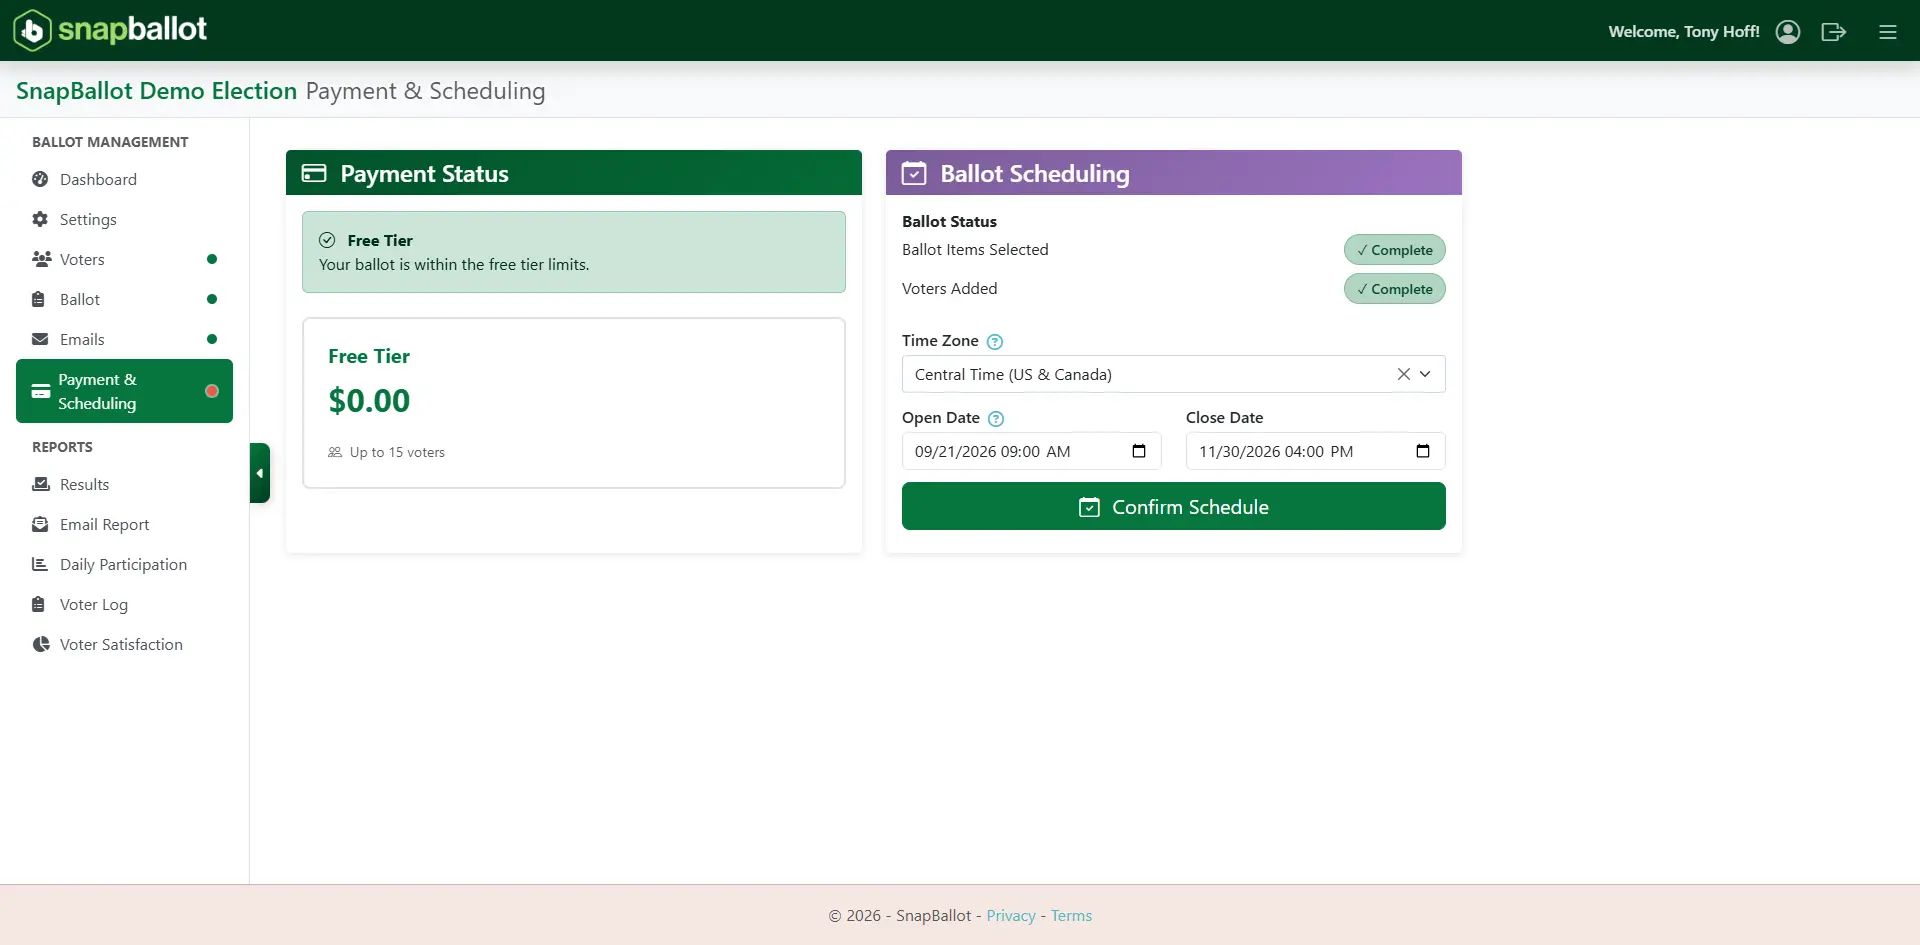
After payment, review the ballot status, time zone, and open and close dates, then confirm your election by clicking Confirm Schedule. Your election is now ready to go.
Related articles

How to View & Export Final Election Results
How to access, view, and export your election's final results — the report types available, real-time updates, and downloading to…
Uploading Your Voter List
Learn how to upload your voter list in SnapBallot, map voter data, set filters, review upload, and manage voter information…
Voter Support
Support voters with confidence — resolve common issues, check status and resend voting links, update emails, send a safe-sender notice,…
Adding Organizations & Administrators
Learn how to create organizations in SnapBallot, organize elections for multiple communities, and invite administrators to manage an entire organization…
From The Blog

Annual Meetings Without the Headache: Easy Online Voting for Food Co-ops
Follow these five steps to set up online voting for your food co-op and make annual meetings easy, fast, and…
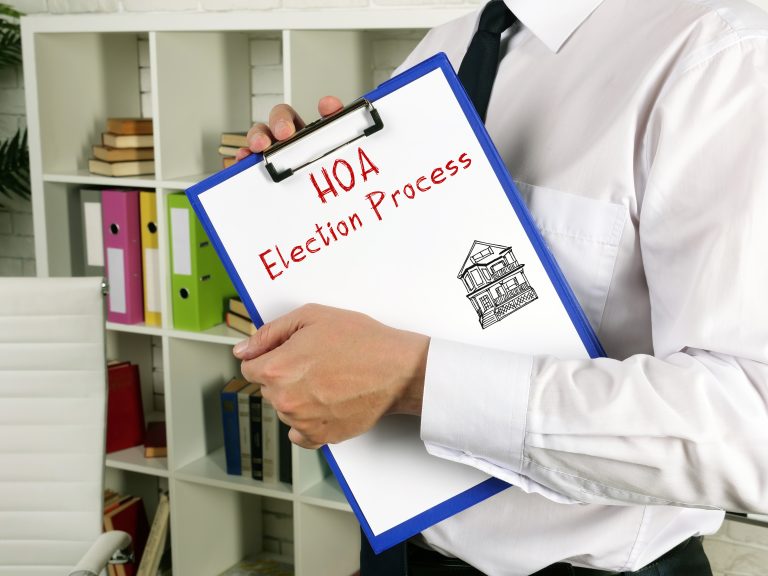
Checklist: Preparing for Your Next HOA Election
Planning will help you run a successful, problem-free HOA election. Follow this checklist to confidently plan every stage of the…

Everything You Need to Launch Your First Online HOA Election
Digitizing your HOA elections will help you save time, preserve resources, and give homeowners a better experience.