
Email Set Up & The Email Report
Last updated September 29, 2026
SnapBallot manages every election email — the invitation, the confirmation, and any reminders — from a single Emails screen, then reports on exactly what was delivered. This guide covers setting up each email type, improving deliverability, scheduling reminders, and reading the Email Report once emails have gone out.
View Transcript
[0:00]: Welcome to Ballot Bites. Today's topic is email setup and the email report. Navigate to "Emails" in the left navigation bar. Three types of emails are shown here with helpful instructions as a guide. All Snap Ballot plans include one invitation email sent to voters at election open, one confirmation email sent to voters after they submit their ballot, and up to two reminder emails.
[0:29]: Let's start with the invitation email. Each email can be customized with your details to personalize your message, and we handle the rest: secure links, login details, and delivery. Sender name, the reply-to email, and the admin default will show here, but you can also change this by adding additional admins if needed. Your subject and then your custom message.
[0:57]: The standard message section is automatic and cannot be customized. This email includes a secure ballot link unique to each voter. After a voter submits their ballot, the ballot link is deactivated to prevent double voting.
[1:13]: Invitation emails are sent automatically at the exact date and time your ballot opens, shown here in the purple section. There are also helpful tips, including a pro tip: Before voting begins, send members a safe sender email. This simple step helps ensure Snap Ballot election emails land in inboxes, not spam folders. You can customize this template with your organization and election details. Copy and paste this into your email and then send to members about one week before voting opens. When you're ready, click "Update Email Invitation," and you're all set.
[1:55]: You can preview each email by clicking the "Preview Email" button. Enter the address that you'd like this to be emailed to, and it'll send you a test. You can also make changes to your invitation email anytime before voting begins.
[2:09]: The confirmation email is sent immediately after a voter submits their ballot. You can update this email with your custom message here. Again, the standard message cannot be changed. It contains the submission details: the date and time that they submitted their vote, and the voter's name with a thank you. When you're ready, hit "Save Confirmation Email."
[2:35]: Reminder emails are sent after voting opens and only go to voters who have not yet voted. Reminders are a great way to encourage participation. Let's go ahead and set one email reminder to voters before the election closes. Click "Add Reminder Email." Set the date and time and customize each section, and then click "Add Reminder Email" to save and schedule your reminder email. Email reminders will also include a unique secure ballot link for that voter.
[3:07]: The scheduled email reminder is now shown in the scheduled email section. You can edit or add reminders up to the time they're scheduled to send, but before the election closes. You may create multiple email reminders with different messages and schedules to improve voter participation. If you would like more than two email reminders, they will be charged depending on your plan. For example, on the $49 plan, which is 16 to 250 voters, each additional reminder email costs $19.
[3:40]: Emails already sent and processed cannot be edited. A helpful section shows how many of your reminders have been used. It's easy to set up your email communications for a successful election in Snap Ballot.
[3:52]: The email report is available after emails have been sent from the dashboard. You can see it here in "Summary and Reports" or from "Reports" in the left navigation menu. A high-level snapshot of your email report can be seen here. Go ahead and click "Email Type."
[4:12]: A pie chart shows the results and defines each term here on hover, as well as below in the filter tabs. Voter details are listed below with a timestamp, and you may use these tabs as filters. For example, clicking "Dropped" or "Bounced" will quickly show you only those emails affected.
[4:40]: Bounced or blocked emails were not delivered. If you want that person to vote, reach out for a new email address and update it under the "Voters" tab.
[4:54]: After updating and saving their email, a pop-up will show the change and you can resend the invitation email during the voting period.
[5:03]: If a member has already voted, the status will show a timestamp on the voters' page. This concludes setting up emails and viewing the email report. Thanks for watching. Grab another bite in our series of quick tips at any.
Access email setup

- In the left navigation bar, click Emails.
- This is where you manage all election email communications.
- You'll see three email types, each with setup guidance: the invitation email, the confirmation email, and reminder emails.
Set up the invitation email
- Invitation emails are sent automatically at the exact date and time your ballot opens.
- Customize the editable fields to personalize the message: sender name, reply-to email, subject line, and custom message.
- The reply-to email should be the admin's email address.
- The standard message is automatic and cannot be edited.
- This email includes a unique, secure ballot link for each voter. Once a voter submits their ballot, that link is deactivated to prevent double voting.
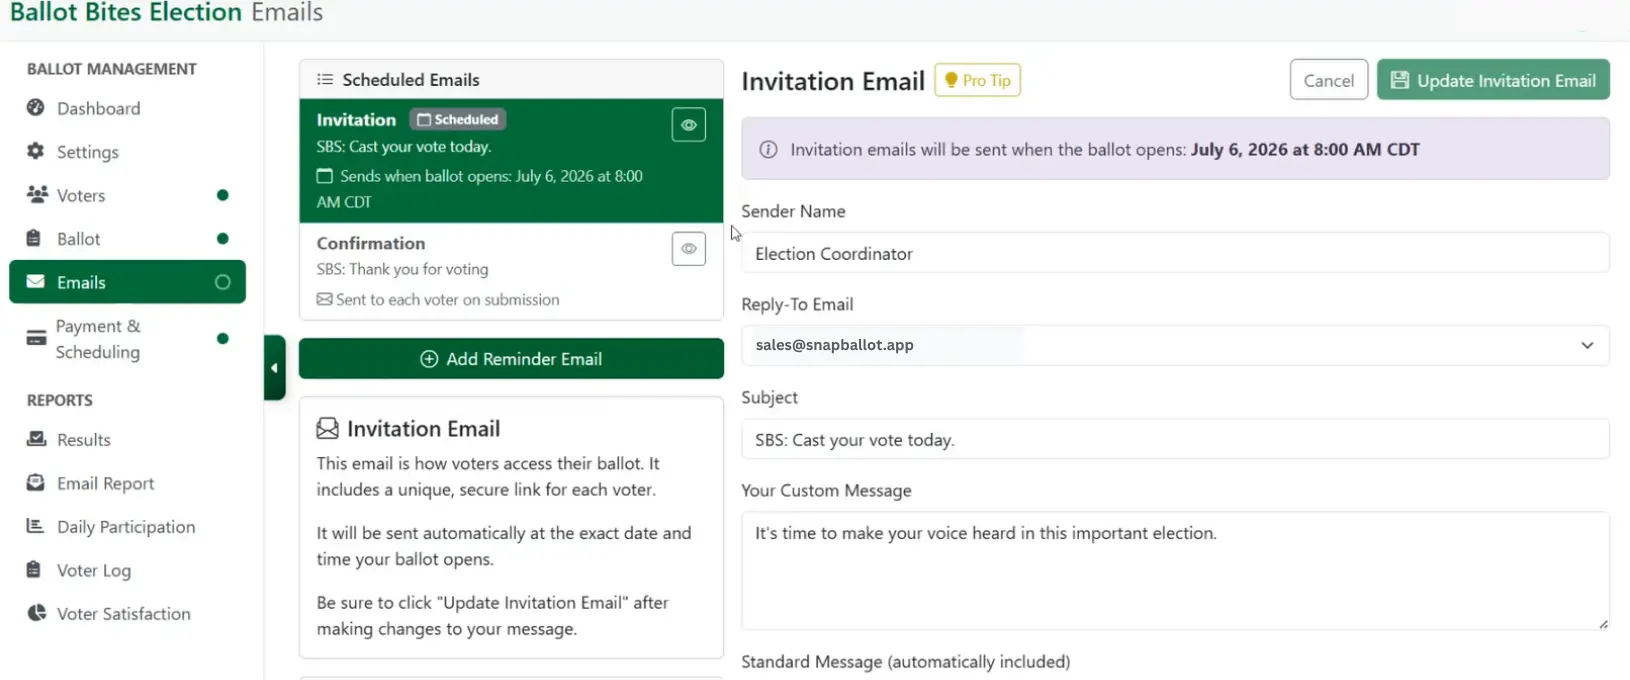
Pro tip: send a safe sender email
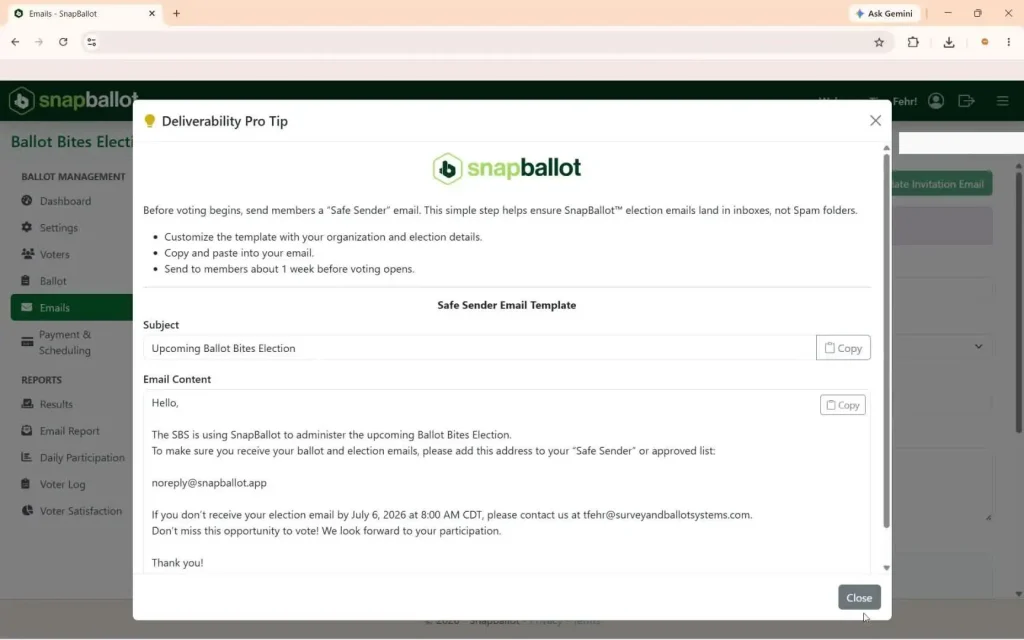
- Before voting begins, send members a safe sender email so election emails are less likely to go to spam.
- Copy the provided template into your own email and send it to members about one week before voting opens.
Preview or test the invitation email
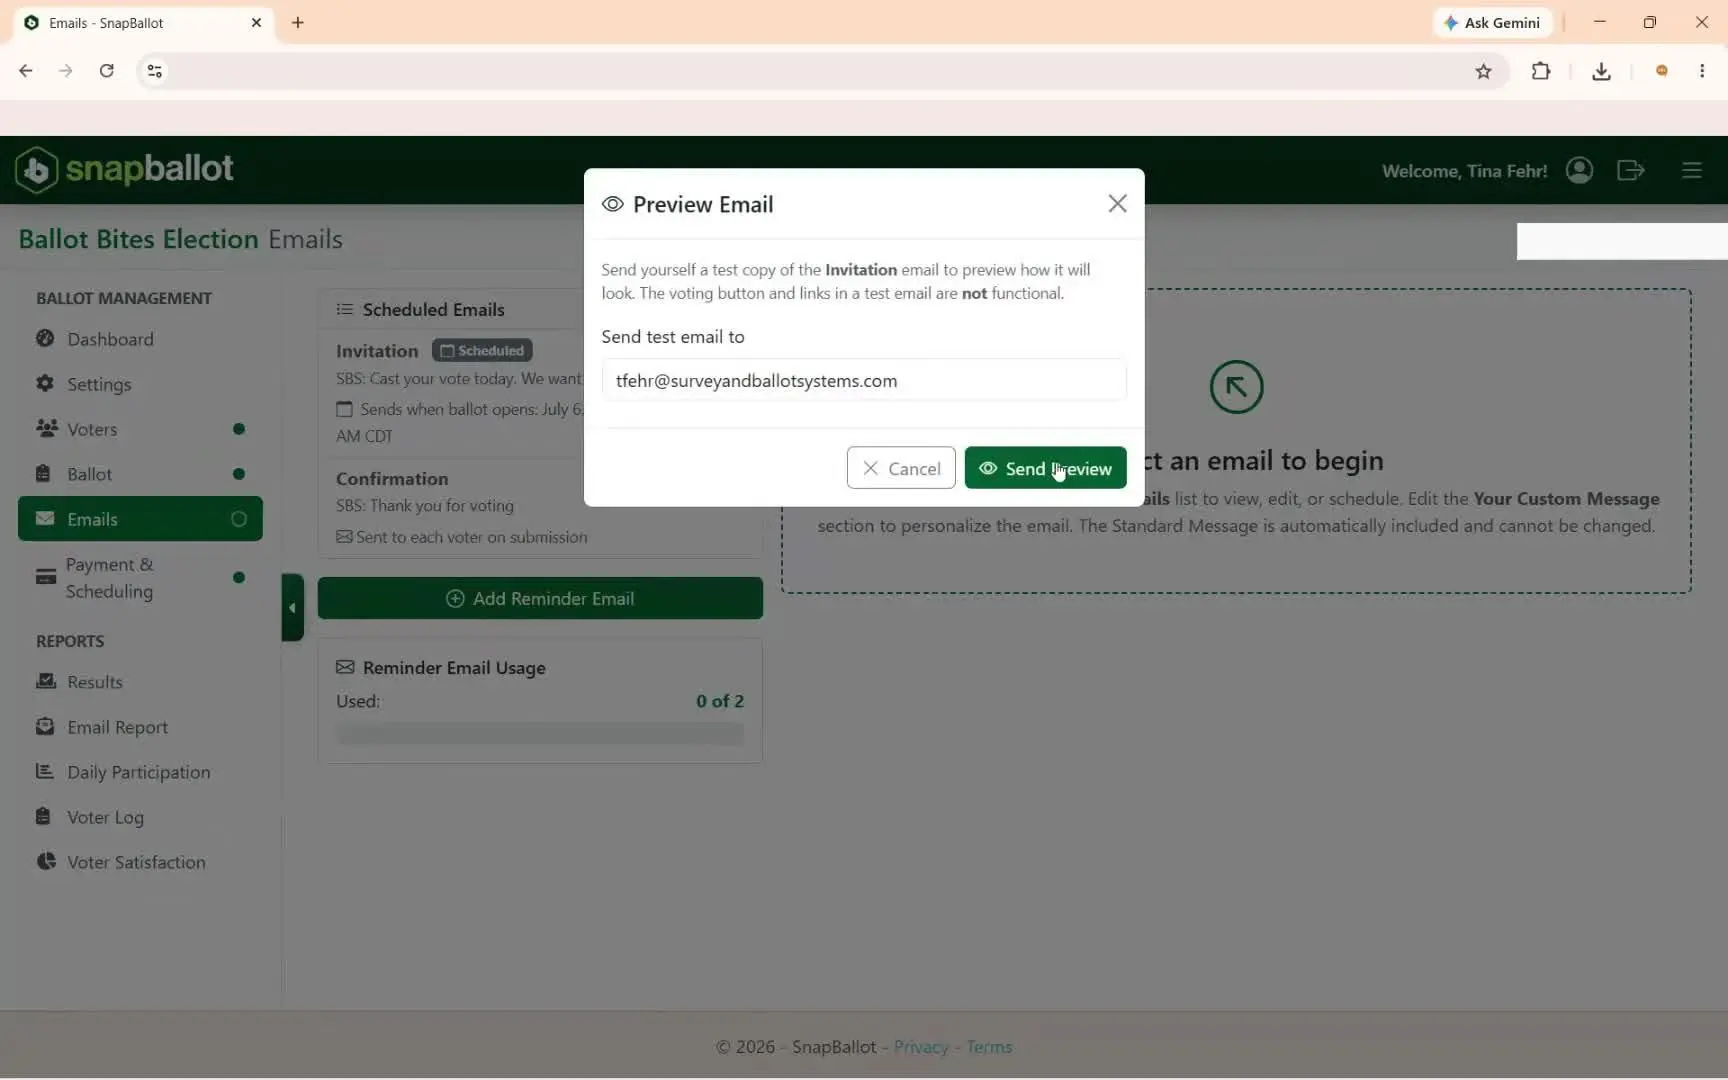
- Use Preview Email to send yourself a test.
- Enter the email address where you want the preview sent.
- You can continue making changes to the invitation email any time before voting begins.
Configure the confirmation email

- The confirmation email is sent immediately after a voter submits their ballot.
- You can customize the editable message area.
- The standard section cannot be changed and includes submission details such as the date and time of submission, the voter's name, and a thank-you message.
- Click Save confirmation email when you're done.
Add reminder emails to increase participation
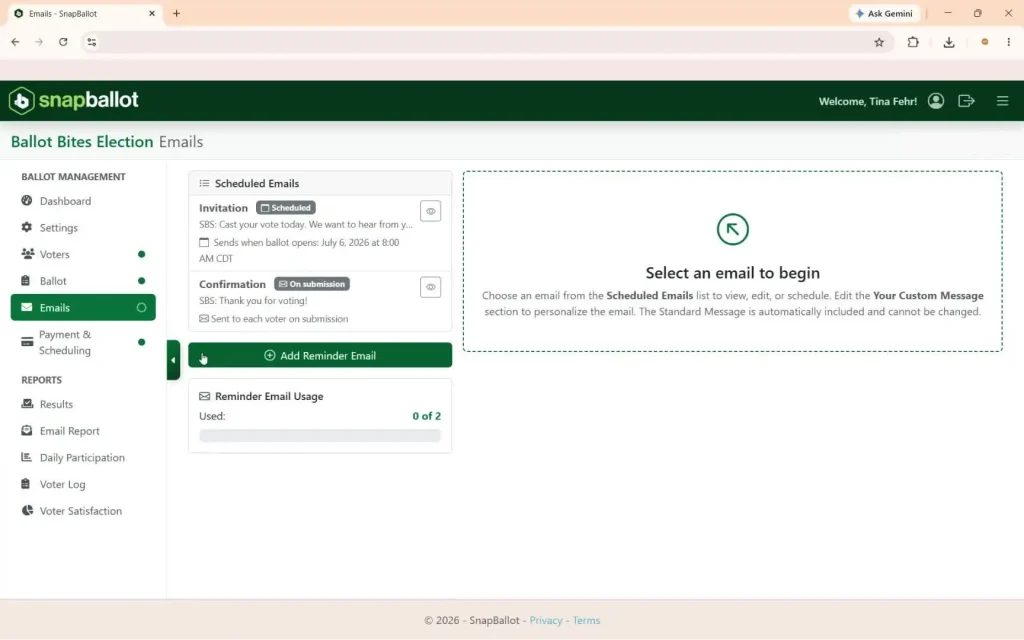
Reminder emails are sent only after voting opens, and only to voters who have not yet voted. To create one:
- Click Add reminder email.
- Set the date and time.
- Customize the message.
- Click Add reminder email again to save and schedule it.
Reminder emails also include a unique, secure ballot link for each voter.
Manage reminder limits and scheduling
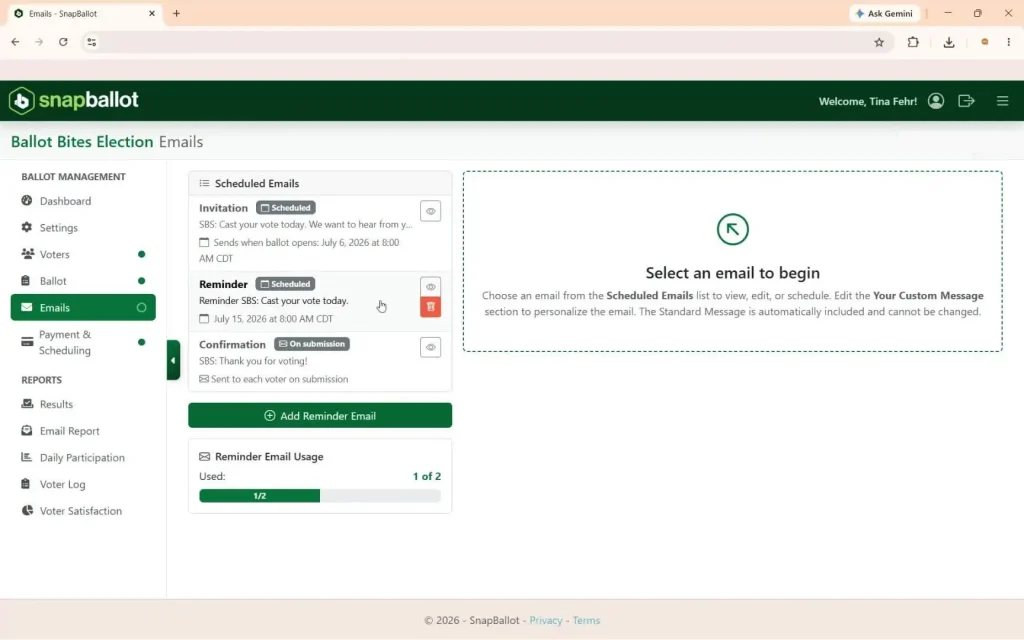
- You can edit or add reminders until their scheduled send time, but before the election closes.
- You can create multiple reminders with different messages and schedules.
- By default, plans include up to two reminder emails. Additional reminders may cost extra depending on your plan — for example, on the $49 plan, each additional reminder costs $19.
- Emails that have already been sent cannot be edited.
- The usage section shows how many reminder emails have been used.
View the email report after emails are sent

- After emails are sent, open the Email Report. You can find it in either of these places: Summary & Reports on the dashboard, or Reports in the left navigation menu.
- The report gives a high-level snapshot of email delivery performance.
Review delivery results and filter by status
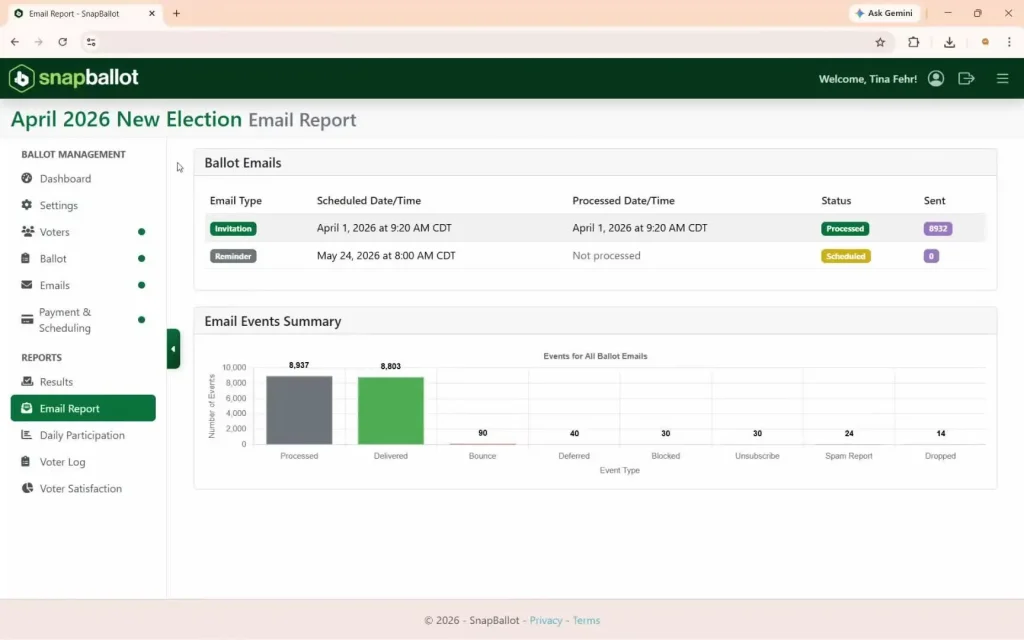
- Click Email Type to view a pie chart of results.
- Hover over chart terms to see their definitions.
- Use the filter tabs to narrow results. The voter list includes timestamps and delivery statuses.
- Helpful filters include Dropped, Bounced, and Blocked.
Fix bounced or blocked emails and resend if needed

Bounced or blocked emails were not delivered. If the voter still needs to vote:
- Ask for a new email address.
- Update it in the Voters tab.
- Save the change — a pop-up will confirm the update.
During the voting period, you can resend the invitation email.
Related articles
Building Your Ballot
How to build your ballot — creating ballot items, adding candidates and biographies, setting voting rules and rotation, filtering by…
SnapBallot Overview
A step-by-step overview of setting up an election in SnapBallot — from creating a ballot and uploading voters to configuring…

Track Voting Participation in Real Time
See how many members have voted while your election is open. The Daily Participation report updates in real time so…
Voter Support
Support voters with confidence — resolve common issues, check status and resend voting links, update emails, send a safe-sender notice,…
From The Blog

5 Ways to Increase Homeowner Engagement in Your HOA Community
Learn 5 practical strategies to boost homeowner engagement, increase HOA election participation, reach quorum, and build a stronger community.
Checklist: Preparing for Your Next HOA Election
Planning will help you run a successful, problem-free HOA election. Follow this checklist to confidently plan every stage of the…
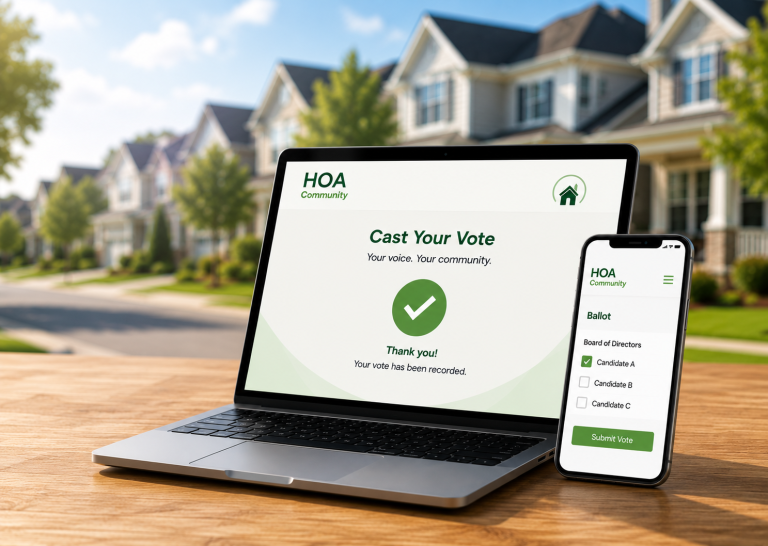
Common Questions About Electronic Voting Systems for HOAs
Get answers to the most common questions about HOA electronic voting systems, including legality, security, compliance, accessibility, and homeowner adoption.